

Setting your nameservers to work with Fastmail is an easy way to make sure your domain has all the correct DNS entries and your mail will work correctly.
Changing your nameservers is the best option if you do not have a website for your domain hosted with another service, or you would like to host both your mail and a website with Fastmail.
We provide a control panel for full customization of your DNS records should you need it. Our nameservers are fast, reliable, and secure. Our web interface for managing DNS is simple, but still powerful enough to allow any number of records of any type.
There are two simple steps to set up your domain:
1. Add your domain
We have a setup guide to help you get your domain working as quickly and easily as possible.
After you have purchased your domain from Gandi, log in to Fastmail and go to the Settings → Domains screen.
Add your domain(s) (e.g. mydomain.com). Using the Add Domain button brings up the new domain screen. Type your domain into the text box.
If your domain has been purchased from Gandi, we will display this on the next screen. You can also choose Gandi from our list of supported registrars.
Follow the wizard to add your email addresses to Fastmail. To have the wizard provide you with steps to update your nameserver records by default, choose No when you are asked if you have a website.
Please note: If you are on a legacy plan, the domain setup wizard can only set up email addresses, not users. You will need to add users manually in order to create additional user accounts at your custom domain.
2. Edit your nameservers at Gandi
Note: We recommend making these changes at a time that you do not expect much traffic for your website or email.
-
Log in to your account at Gandi.
-
Click Domain in the left hand panel, then click on the domain you would like to use with Fastmail.
-
Click on the Nameservers tab.
-
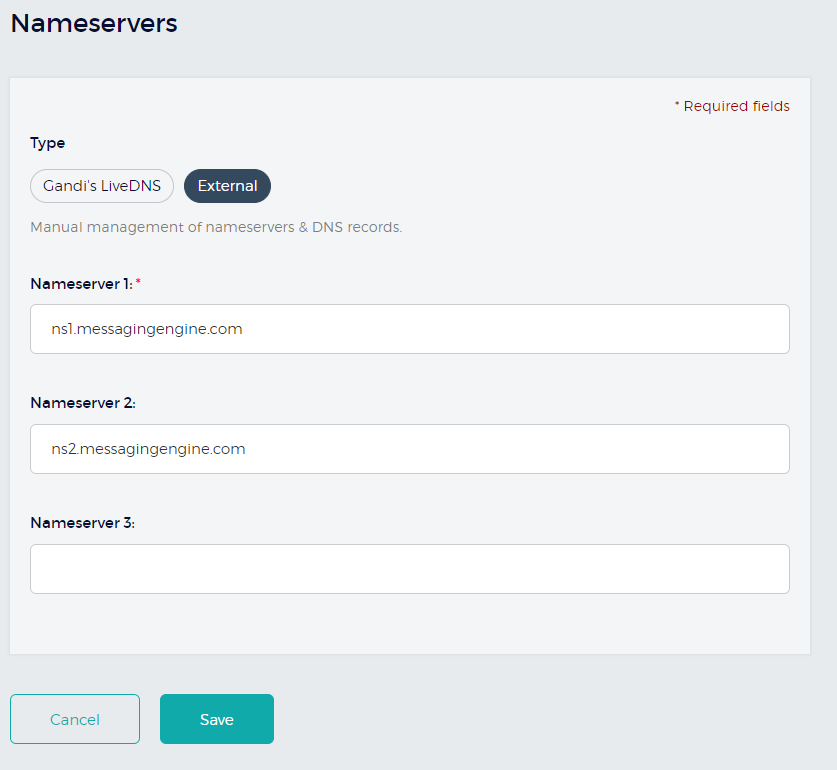
Click Change, and change the type to External. Make sure your domain has two nameservers, which are:
-
ns1.messagingengine.com ns2.messagingengine.com
If you have any other nameservers added in addition to these, delete them. Then click Save to save the changes.
When you are finished, your nameservers should look like this:
- To check that the settings have been updated correctly, log in to your Fastmail account and go to the Settings → Domains screen. Click Recheck DNS. Your domain should now say
Active. Nameservers set.
For advanced domain options when using Fastmail's nameserver records, please see our page here.